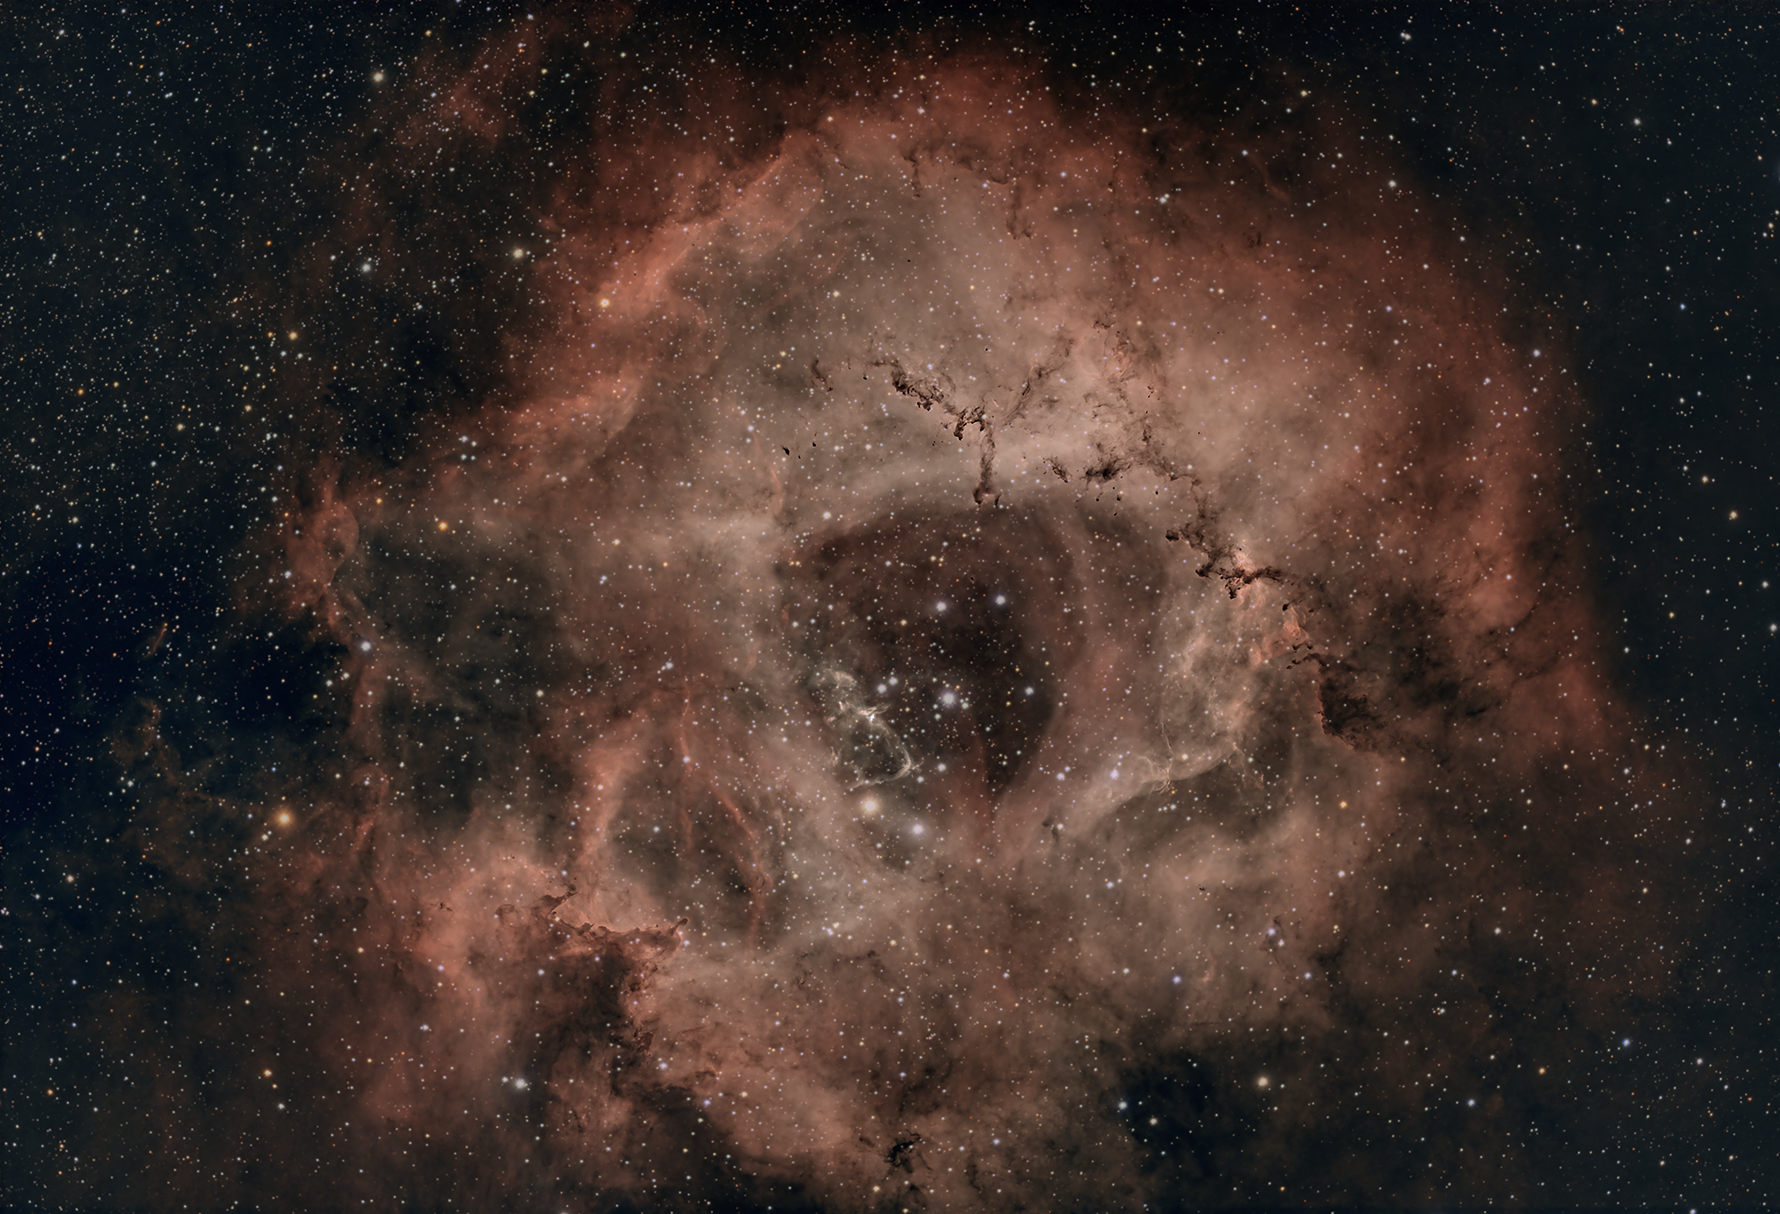
The massive Rosette Nebula is a truly fantastic object to observe. Both photographically and visually. This article covers my latest attempt at this object.
If you would like to see Full Resolution Images, Please check one of the following:
- Astrobin submission for capture details: https://astrob.in/00cb8i/0/
- Flickr for full resolution: https://flic.kr/p/2o8U6mN
NGC 2239 – The Rosette Nebula – This object has both an open cluster as well as a nebulous region in the constellation Monoceros. There is a lot going on here, and you should take a little time to admire the details of the object. A fun observation often highlighted, is that you can also see the shape of a human skull in the object, and some folks call it the Skull Nebula as well.
NGC 2239 is about 5,200 – 5,500 light years away, and about 128 light years in diameter. It is considered an active star forming region with thousands of “newborn/young” stars within it. This object is considered equally stunning when the star field is artificially removed.

This is one of those objects that will always be a work in progress. Adding more data over a period of time will continue to pull out faint details, lower noise and increase color contrast. One of my fondest visual observing memories is when I once spent about 30-40 minutes panning and scanning this massive object using Kopernik Observatory & Science Center’s 20” telescope on a cold 15F night. I was really just lost in the awe of this object. My mind was blown at the limited NGC detail I saw then, some 10 years ago. I never imagined I would be imaging this kind of detail today.

Image Capture Details:
- False Color Palette: RGBHOO2
- Red – 8 x 300s
- Green – 10 x 300s
- Blue – 10 x 300s
- H-Alpha – 30 x 300s
- OIII – 25 x 300s
Lesson Learned: If you are going to do long exposures over a long period of time, be sure to use the same framing. I have about 2 hours of data from 2021, but the framing of the object is completely different than what I’m targeting today. You can see the differing gradient lines caused by how the image data stacks in the unprocessed image below. If anyone has a trick for dealing with this, and averaging out the data – I would love to learn.

Image Processing Workflow:
- AstroPixel Processor – Calibration & Integration
- Light and Calibration Frames Definition
- Calibration of Light Frames – Mostly Default Settings
- Star and Frame Quality Analysis
- Frame Registration
- Frame Normalization
- Image Integration
- Channel Combination
- RGBHOO
- PixInsight – Post Processing
- Dynamic Crop
- Dynamic Background Extraction (DBE)
- Image Plate Solving
- Photometric Color Calibration
- Histogram Transformation
- Luminance, Inverse, TGVDenoise
- SCNR – Green Removal
- BlurExterminator
- StarExterminator – Create a star frame and a non-stellar frame
- Photoshop – Post Processing
- Load starless frame as background
- Load Star frame and set up Blending to be Linear Dodge Add
- Starless Processing:
- Levels and Curves
- Hue, Vibrance and Saturation
- Topaz Labs – Denoise AI – very mild no sharpening
- Topaz Labs – Adjust AI – very mild sharpening and clarity. Final tweaks on Black settings.
- Final Color Tweaks – specific features using masks.
- Stars Processing:
- Modify Star Brightness and fuzz up a bit
- Star saturation boost
- Publishing of 1x, .5x and .25x PNG files