If you would like to see Full Resolution Images, Please check one of the following:
- Astrobin submission for capture details: https://www.astrobin.com/l0gz19/
- Flickr for full resolution: https://flic.kr/p/2okdPfa
Introduction:
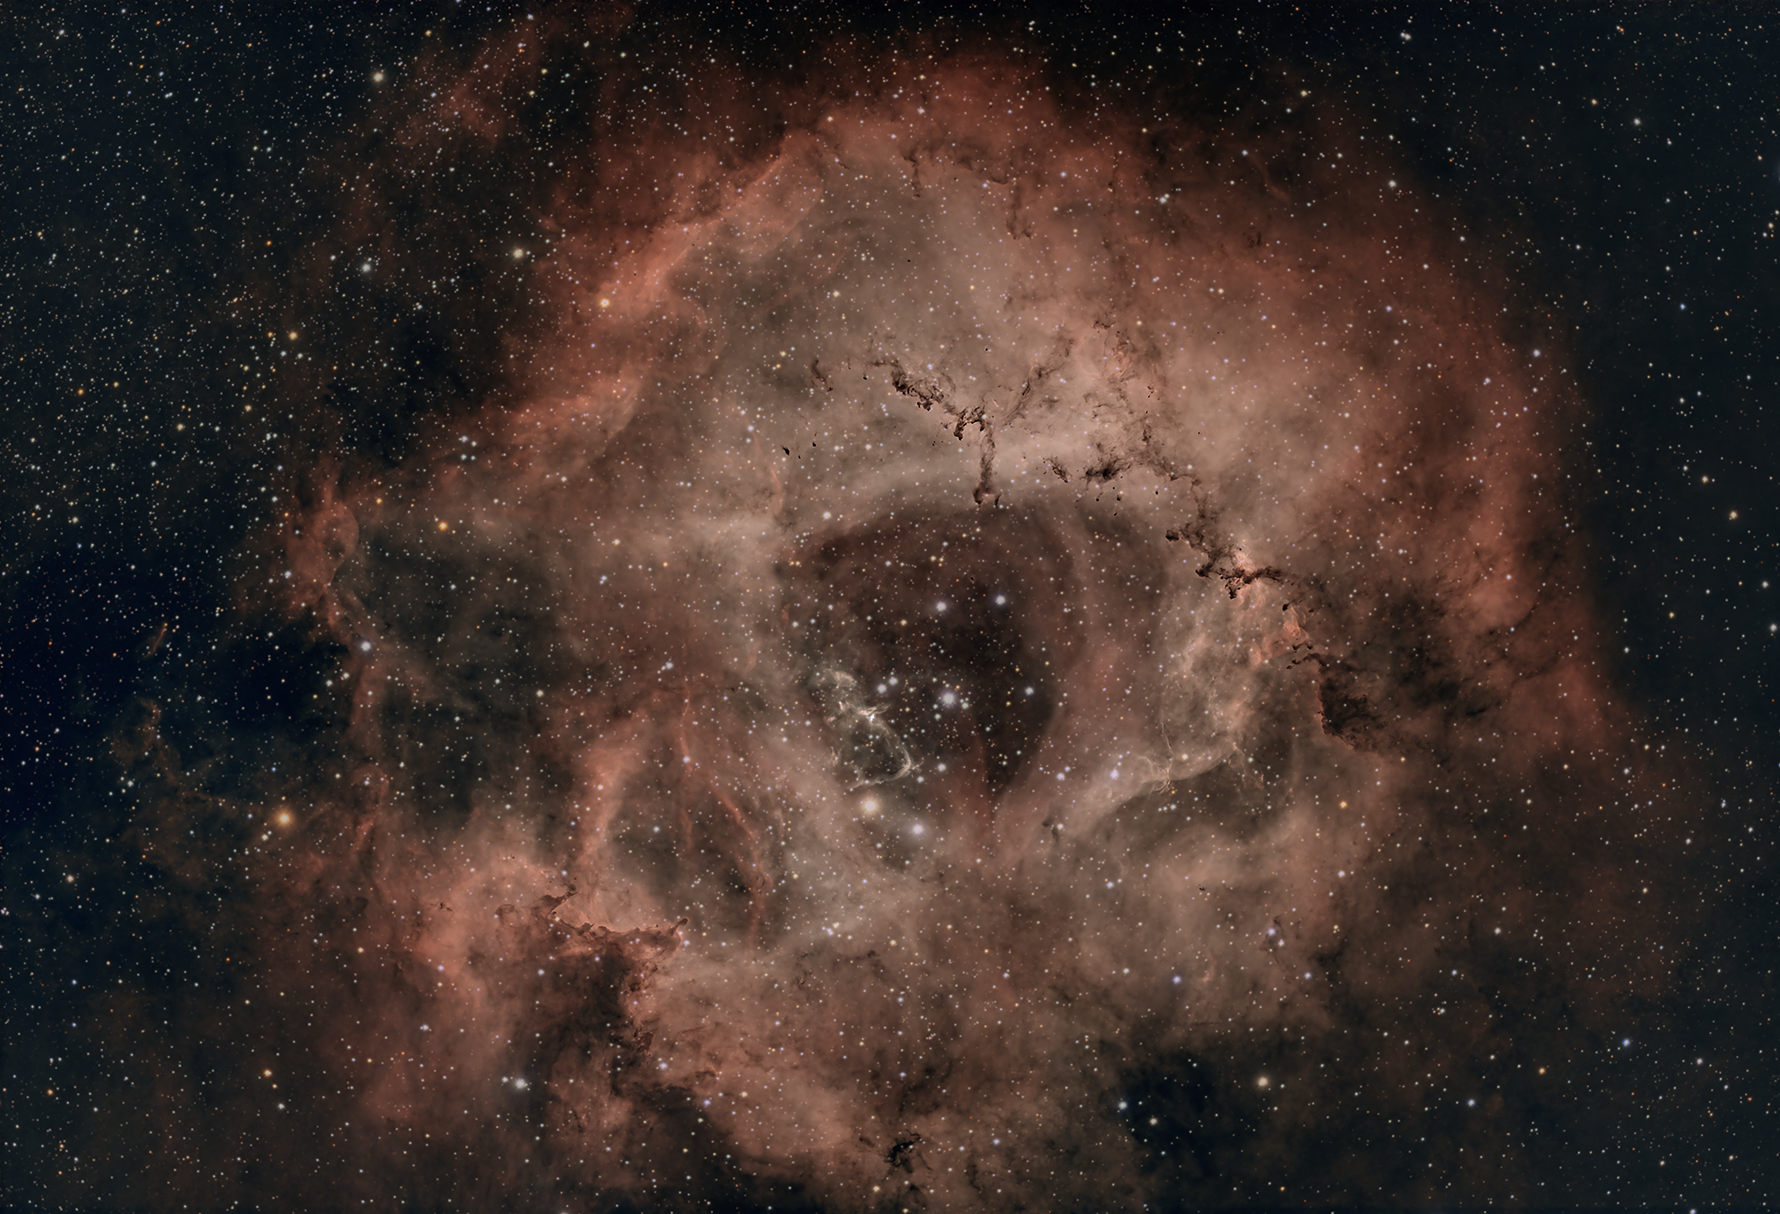
Narrowband filters are specialized optical filters that are used in astronomy to isolate specific wavelengths of light emitted by certain astronomical objects. Unlike broadband filters, which transmit a wide range of wavelengths, narrowband filters are designed to transmit only a narrow range of wavelengths. Three of the more common narrowband filters are Hydrogen Alpha, Oxy
gen III and Sulphur II. The light captured with these filters can be combined into false color high-contrast images that highlight the intricate structures and details of nebula,
One of the things I have been tinkering with the last few months is to learn how to process in narrowband false color palettes, and to try to learn how to follow the approaches many use in these schemes. The Hubble Palette, SHO uses Sulfur II filtered light in place of red, Hydrogen Alpha filter in place green and Oxygen III in place of blue. This is a wild configuration that causes hydrogen rich targets to get washed out and overwhelmed with mostly green colors.

While everyone gets amped up over a Green Comet, nearly NO one gets amped up for a falsely colored green nebula…apparently (applies to me as well). Upon doing some research, I discovered how to properly process Hubble Palette images in this video (https://youtu.be/YGMRn-fMVV8) by James Lamb. Using Lamb’s Pixel Math script really made things super simple to get a decent base

Lessons Learned:
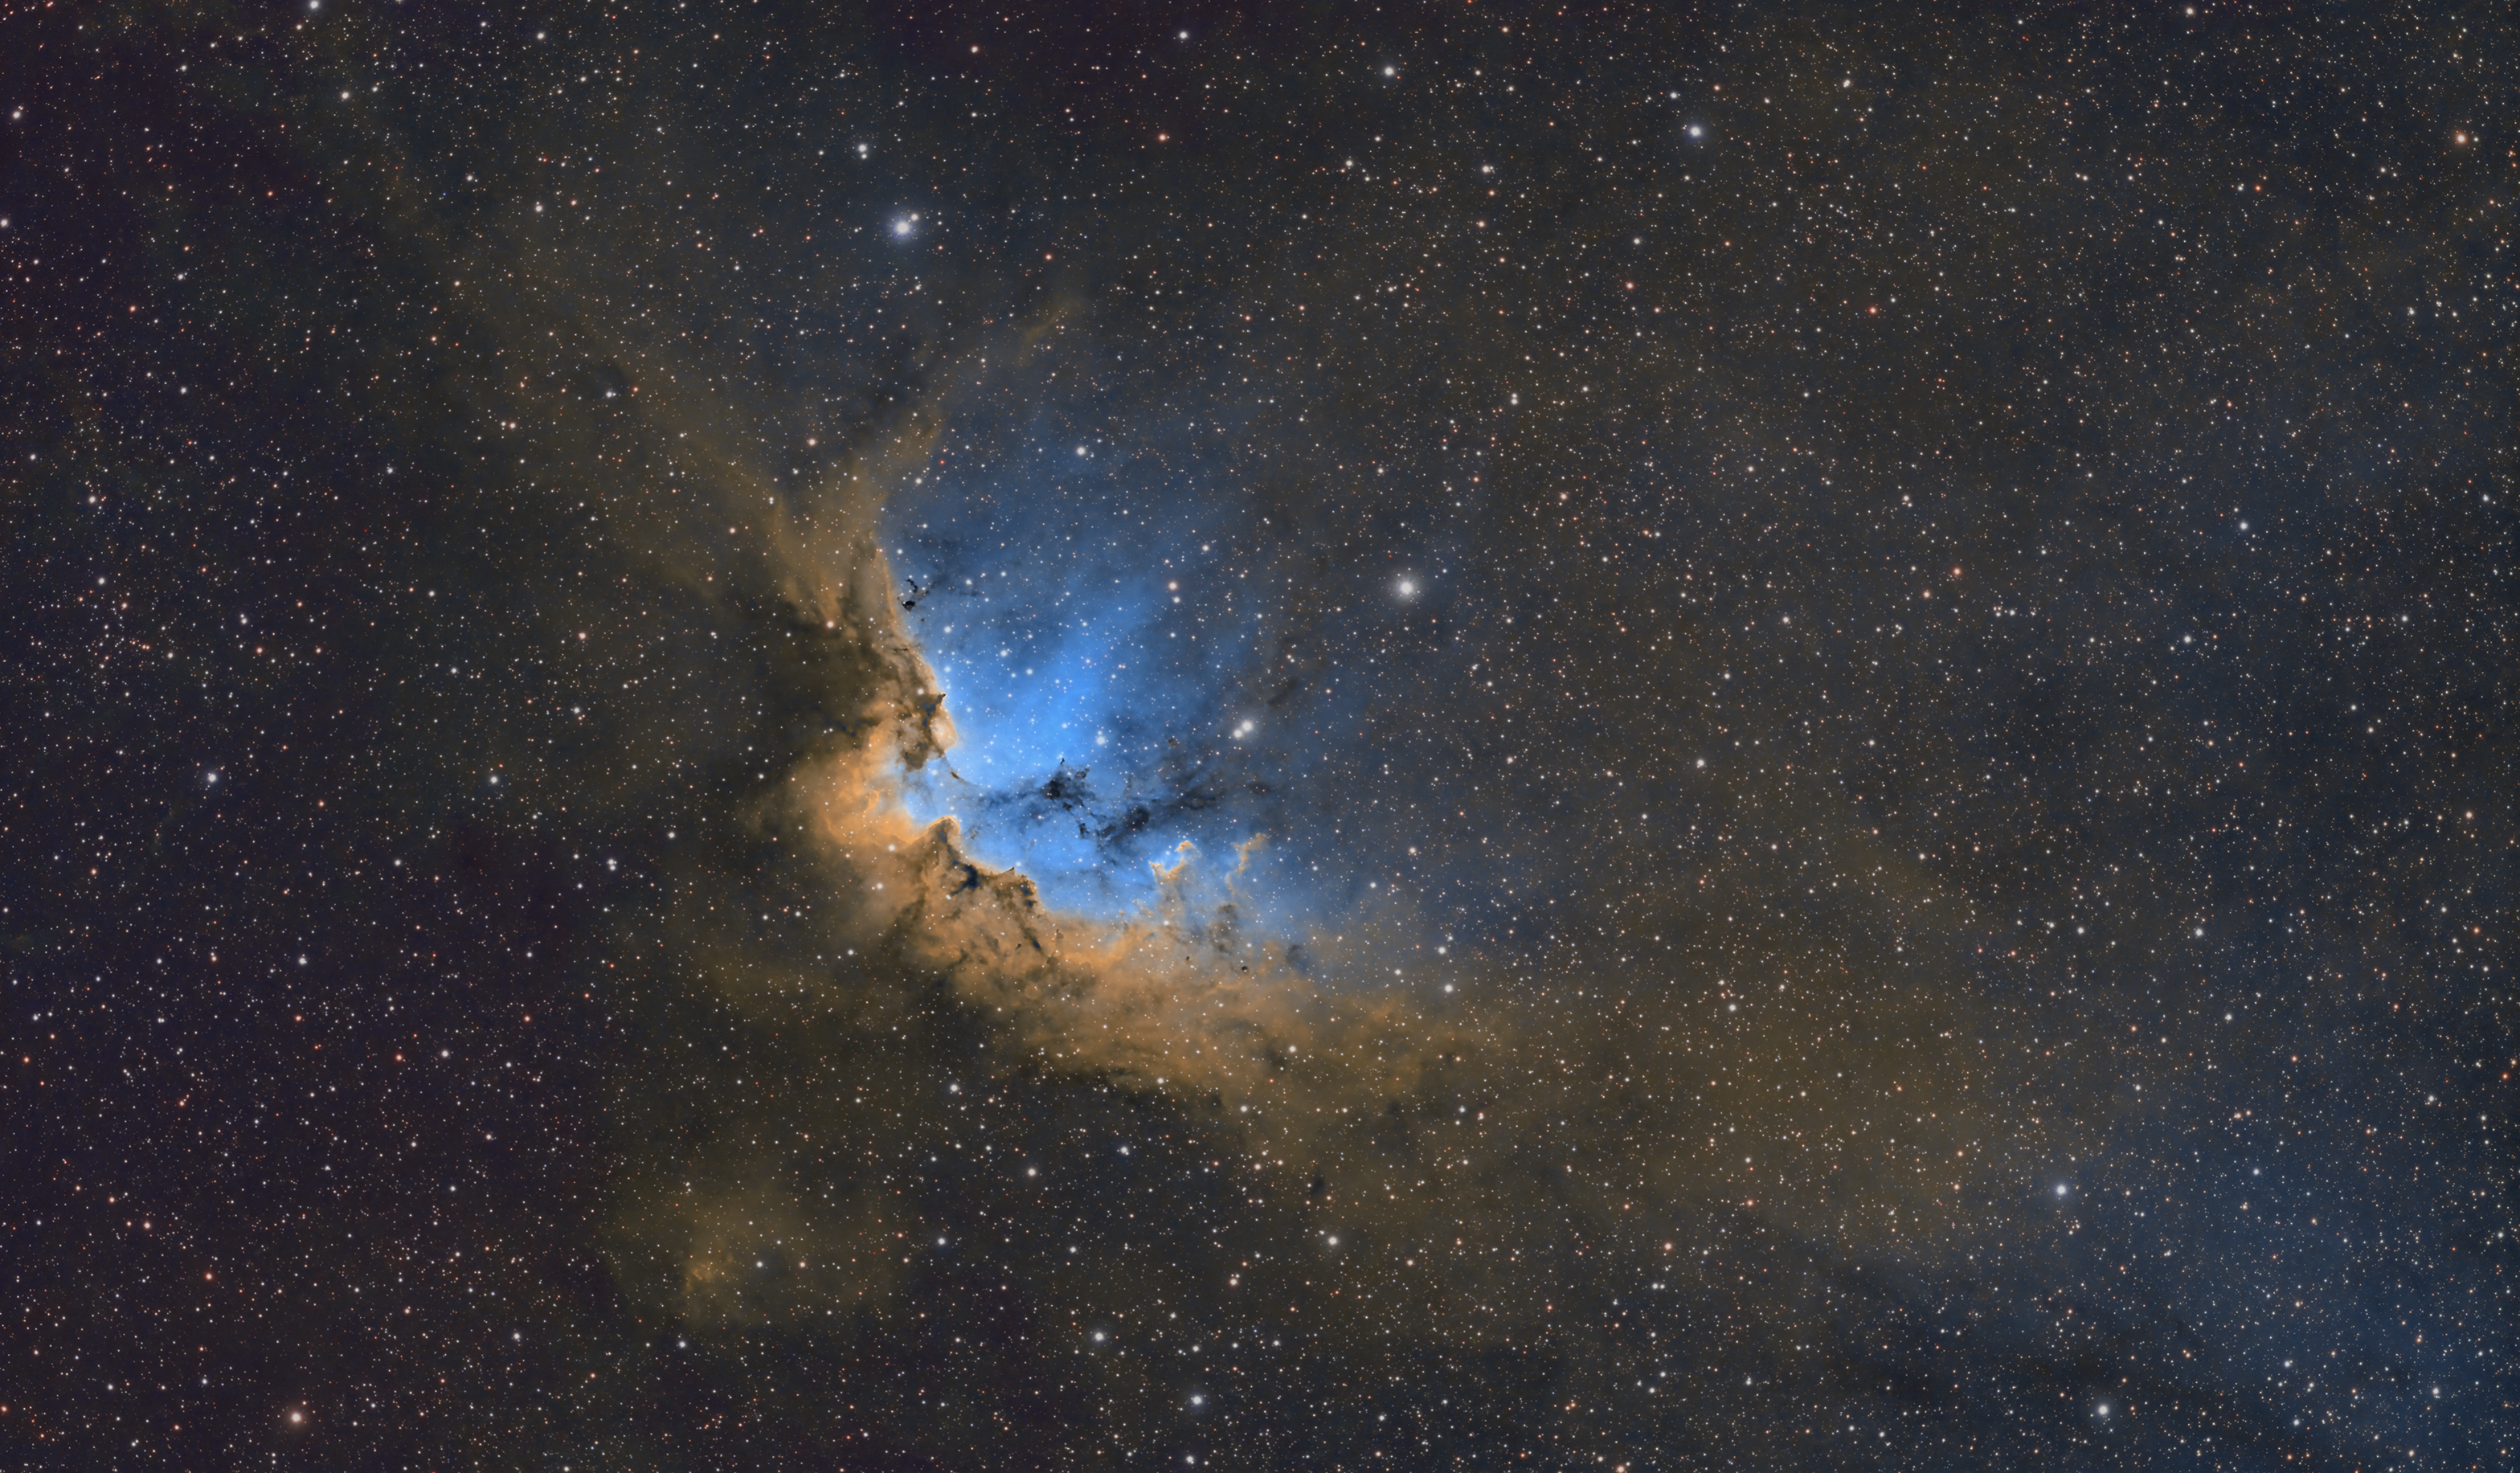
One thing I have noticed about a lot of astrophotographers is that they REALLY like to push the vibrance and saturation way up on the SHO processed images. I tend to try and find a more realistic saturation setting. Compare the one above to the one below, and tell me which one you prefer.

Object Info:
Either way, NGC 7380 is a pretty trippy object. I have found that many folks struggle to find the wizard in the Wizard Nebula. I actually can abstract two different possible views of two different wizards in the nebula. Either way it is a hoot to just admire it for all of its dramatic nebulosity. Can you see the Wizard in there?

- Name: NGC 7380
- Other Designations: Wizard Nebula, Sharpless 142, LBN 511
- Type: Open Cluster with Emission Nebula
- Constellation: Cepheus
- RA: 22h 47m 00s
- Dec: +58° 13′ 15.5″
- Magnitude: +7.19
- Apparent Size: 30.0′ x 30.0′
- Distance: 1,800 – 7,200 light-years (depending on the source)
- Radius: 13 light-years wide
- Discoverer: Caroline Herschel
- Discovery Date: 1787

ChatGPT Information:
The Wizard Nebula, also known as NGC 7380, is an emission nebula located in the constellation Cepheus. The nebula is named for its resemblance to a fantasy wizard, with a central “face” surrounded by a “robe” of glowing gas.
Here are some key facts about the Wizard Nebula:
- The Wizard Nebula has a visual magnitude of approximately 7.2, which makes it a challenging object to observe with the naked eye. It is best viewed through a telescope or binoculars under dark skies.
- The nebula is located at a distance of approximately 7,200 light-years from Earth.
- The Wizard Nebula has a diameter of approximately 100 light-years, and it is one of the largest and most complex emission nebulae in the Milky Way galaxy.
- The nebula is illuminated by several young, massive stars, including several O-type stars that are among the most massive and luminous stars in the galaxy. These stars emit intense ultraviolet radiation that ionizes the surrounding gas, causing it to glow.
- The Wizard Nebula is also home to a cluster of young stars, which formed from the same cloud of gas and dust that gave rise to the nebula itself. These stars are still relatively young and are surrounded by glowing gas and dust.
- The nebula is a popular target for astrophotographers, who use specialized narrowband filters to isolate the light emitted by hydrogen, oxygen, and sulfur atoms in the nebula. This allows them to create stunning, high-contrast images of the nebula’s intricate structure and detail.
Gear Used:
- Stellarvue SVX102T
- Losmandy G11 Mount
- ZWO ASI2600MMP
- ZWO Color & Narrowband Filters 2”
Image Capture Details:
Date: December 2022 – January 2023
Integration Method: RGB Stars + SHO Nebula
- RGB Stars:
- Red – 5 x 300s
- Green – 5 x 300s
- Blue – 5 x 300s
- Narrowband Comet:
- Hydrogen-Alpha – 30 x 300s
- Oxygen III – 25 x 300s
- Sulphur II – 25 x 300s
Image Processing Workflow:
- AstoPixel Processor – All Pre-Processing Steps – Calibration, Registration, Integration, Normalization, etc. SHO & RGB combination into two files.
- Note: I processed this data in two workflows, and combined at a very late step. The first thread of processing was to process the Nebula SHO data. The second thread was focused on getting color accurate stars combined to replace the SHO star field on the final product.
- Pixinsight – Nebula Post Processing
-
- Crop
- Dynamic Background Extraction
- Background Neutralization
- Blur Exterminator
- Histogram Transformation
- NoiseXterminator
- StarXterminator – Isolated Nebula from SHO stars
- Lamb’s SHO Pixel Math Script as discussed in the referenced video above.
- Save TIF Files for processing in PixInsight.
- PixInsight – Star Field Post Processing
- Dynamic Crop – both frames same crop
- Dynamic Background Extraction (DBE) (not needed)
- Background Neutralization – (not needed)
- Photometric Color Calibration
- BlurXterminator
- Histogram Transformation
- SCNR – Green Removal
- NoiseXterminator –
- StarExterminator – just the RGB stars frame
- At this point we have two frames – one with just the RGB stars and one with just the nebula without stars. Save them both as 16 bit TIFFs and I moved over to photoshop where I’m more comfortable.
- Photoshop – Post Processing
- Load starless frame as background
- Load Star frame and set up Blending to be Linear Dodge Add
- Starless Processing:
- Levels and Curves
- Hue, Vibrance and Saturation
- Topaz Labs – Adjust AI – very mild sharpening and clarity. Final tweaks on Black settings.
- Final Color Tweaks – specific features using masks.
- Selective Color to switch yellowish to orangish to boost overall contrast
- Selective Color to boost the contrast of bluish parts.
- Stars Processing:
- Modify Star Brightness and fuzz up a bit
- Star saturation boost & Vibrance
- Publishing of 1x, .5x and .25x PNG files