
Adding the Power of GPU Processing to PixInsight
Many of the new tools used in PixInsight today leverage AI/ML algorithms to predict what the right changes should be while processing that image data. These algorithms can run just fine on CPUs, but GPU’s can easily reduce the time it takes to do this processing by an order of magnitude.
Some Good Examples of Processes which use machine learning include:
- StarNet++
- BlurXterminator
- NoiseXterminator
- StarXterminator
Enabling the Cuda Cores in an NVidia GPU Card of some kind and using the Tensorflow machine learning platform can take these processes from running for 5 minutes down to 15-20 seconds.
I was doing some searching online, and I was able to find older procedures for doing this, but things just hung when I followed them. I got a bit discouraged, and set that aside for a while. Then luckily I recently participated in a Masters of PixInsight (great work by the team there – I learned a ton!) webcast tutorial, and joined their facebook group afterwards. And sure enough one of the more recent posts in the closed group went into exactly how to get this all up and running with the latest software.
Here’s the procedure I used to get mine working. Much of this comes thanks to a guy named Jason Coon who I do not know yet. Note I am using Windows 10/11 64 bit architecture. You must have an NVidia Based Graphics Processing Unit of some kind that includes Cuda Cores. All you gamers out there – you’ve very likely got what you need!
First follow the steps used in this article…very good detail. Note below I will lay out a software Bill of Material that is more recent software versions compatible with PixInsight Ripley 1.8.9-1.
Software Bill of Materials for this procedure.
- CUDA 11.8 https://developer.download.nvidia.com/…/cuda_11.8.0…
- cuDNN 8.7 https://developer.nvidia.com/…/c118-cudnn-windows-8664…
- ZLIB! http://www.winimage.com/zLibDll/zlib123dllx64.zip
- Tensorflow 2.9.0: https://storage.googleapis.com/…/libtensorflow-gpu…
NOTE: I will try to keep this article updated as PixInsight upgrades over time.
Follow darkarchon’s instructions to install the above software. https://darkskies.space/pixinsight-starnet-cuda/
Some Notes on the instructions…
- Some of these are installers, and some of these are extract the zip archive and move certain files out of the archive to the right place.
- Be sure to not install the demos on the NVIDI software – they chew on lots of storage space.
- Follow directions very closely
- For the cuDNN software – I have to create a developer account for NVidia. This includes email verification so be prepared to add more to your spam filter.
Now I had followed these instructions to the letter. And when I tried to test, everything froze. I was bummed once again, and then I noticed a note by Jason Coon on the following:
ONE FINAL INSTALLATION STEP: With the newer versions you also need ZLIB! From that archive extract zlibwapi.dll into …Toolkit\CUDA\v11.8\bin.
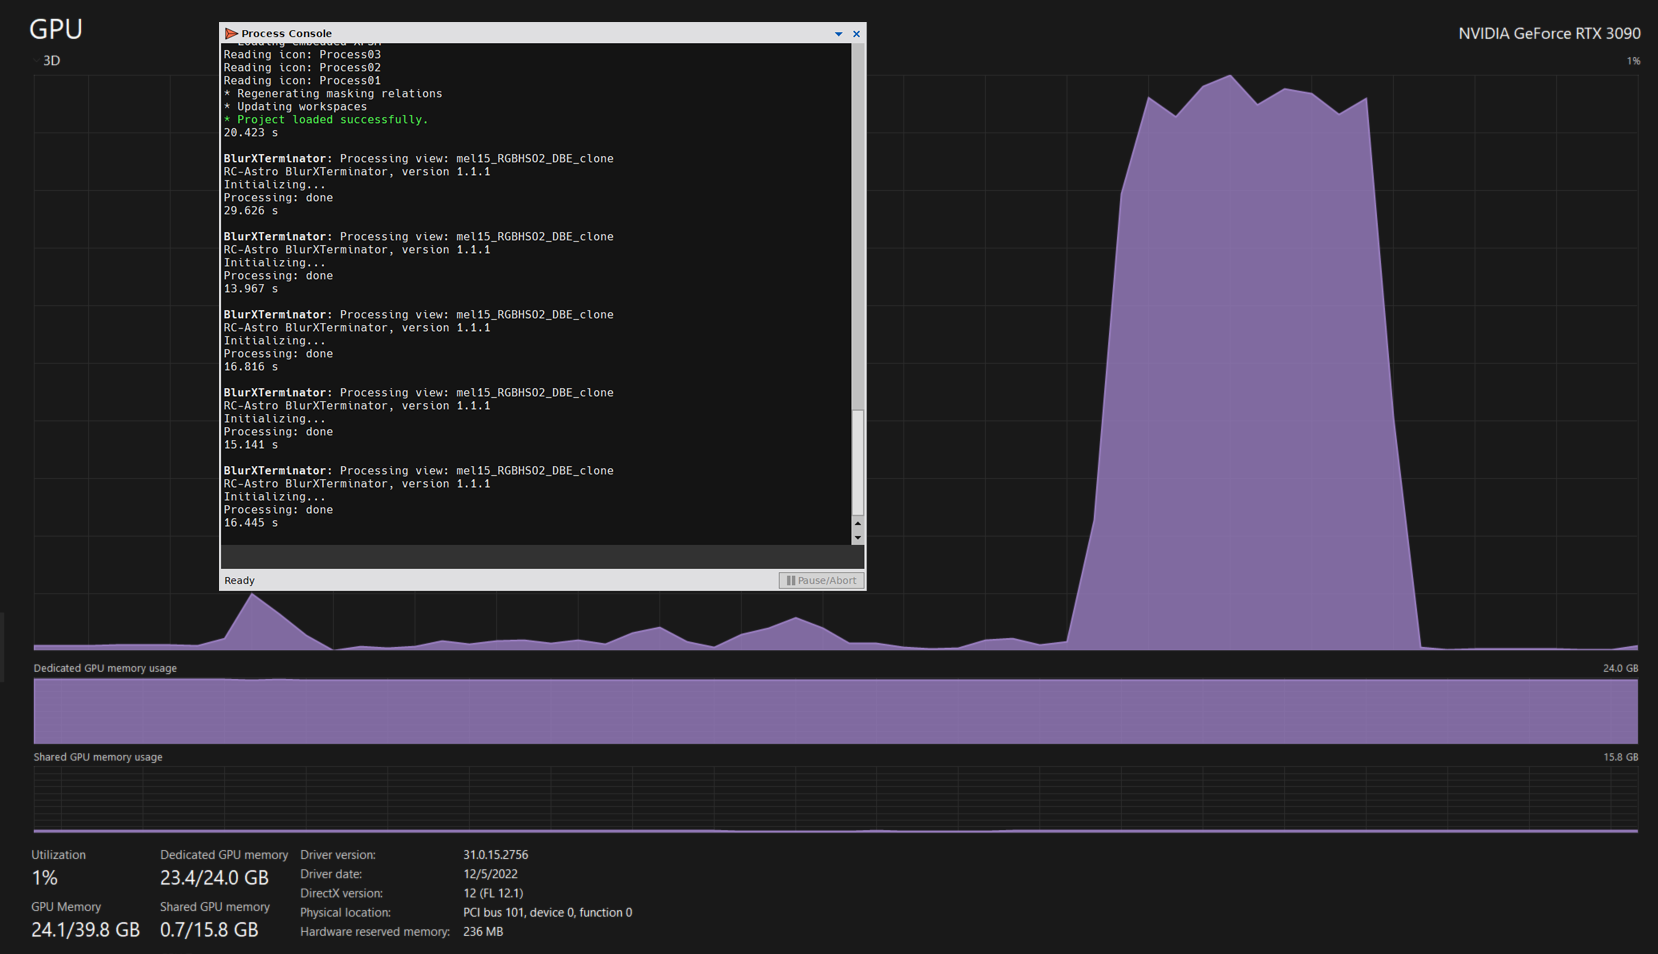
After I did this and ran a test on my system using BlurXterminator, my GPU was pegged, and the operation went from 4-5 minutes to 12 – 16 seconds.

